The museum is open on Saturdays from 9:00 am to 3:00 pm Central Daylight Time (Chicago Time).
Photo Galleries

Historic Railroad Photos
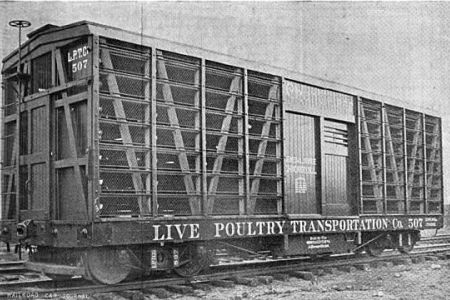
Live Poultry Cars
No images were found.
Hoosier Valley Railroad Museum
507 Mulberry Street
P.O. Box 75
North Judson, Indiana 46366
P.O. Box 75
North Judson, Indiana 46366
Call or Email
574-896-3950 Depot Phone
[email protected]
Museum Hours
We will be open Saturdays starting May 9, 2026.
The museum operates on Central Time (Chicago Time)
Copyright © 2026 Hoosier Valley Railroad Museum, Inc.